Introduction to StreamPipes Python
Why there is an extra Python library for StreamPipes?
Apache StreamPipes aims to enable non-technical users to connect and analyze IoT data streams.
To achieve this, it provides an easy-to-use and convenient user interface that allows one to connect to an IoT data source and create some visual
graphs within a few minutes.
While this is the primary use case for Apache StreamPipes, it also offers significant value to those interested in data analysis or data science with IoT data, without the need to handle the complexities of extracting data from devices in a suitable format.
In this scenario, StreamPipes helps you connect to your data source and extract the data for you.
You then can make the data available outside StreamPipes by writing it into an external source, such as a database, Kafka, etc.
While this requires another component, you can also extract your data directly from StreamPipes programmatically using the StreamPipes API.
For convenience, we also provide you with a StreamPipes client both available for Java and Python.
Specifically with StreamPipes Python, we want to address the amazing data analytics and data science community in Python and benefit from the great universe of Python libraries out there.
How to install StreamPipes Python?
Simply use the following pip command:
%pip install streampipes
If you want to have the current development state you can also execute:
%pip install git+https://github.com/apache/streampipes.git#subdirectory=streampipes-client-python
The corresponding documentation can be found here.
How to prepare the tutorials
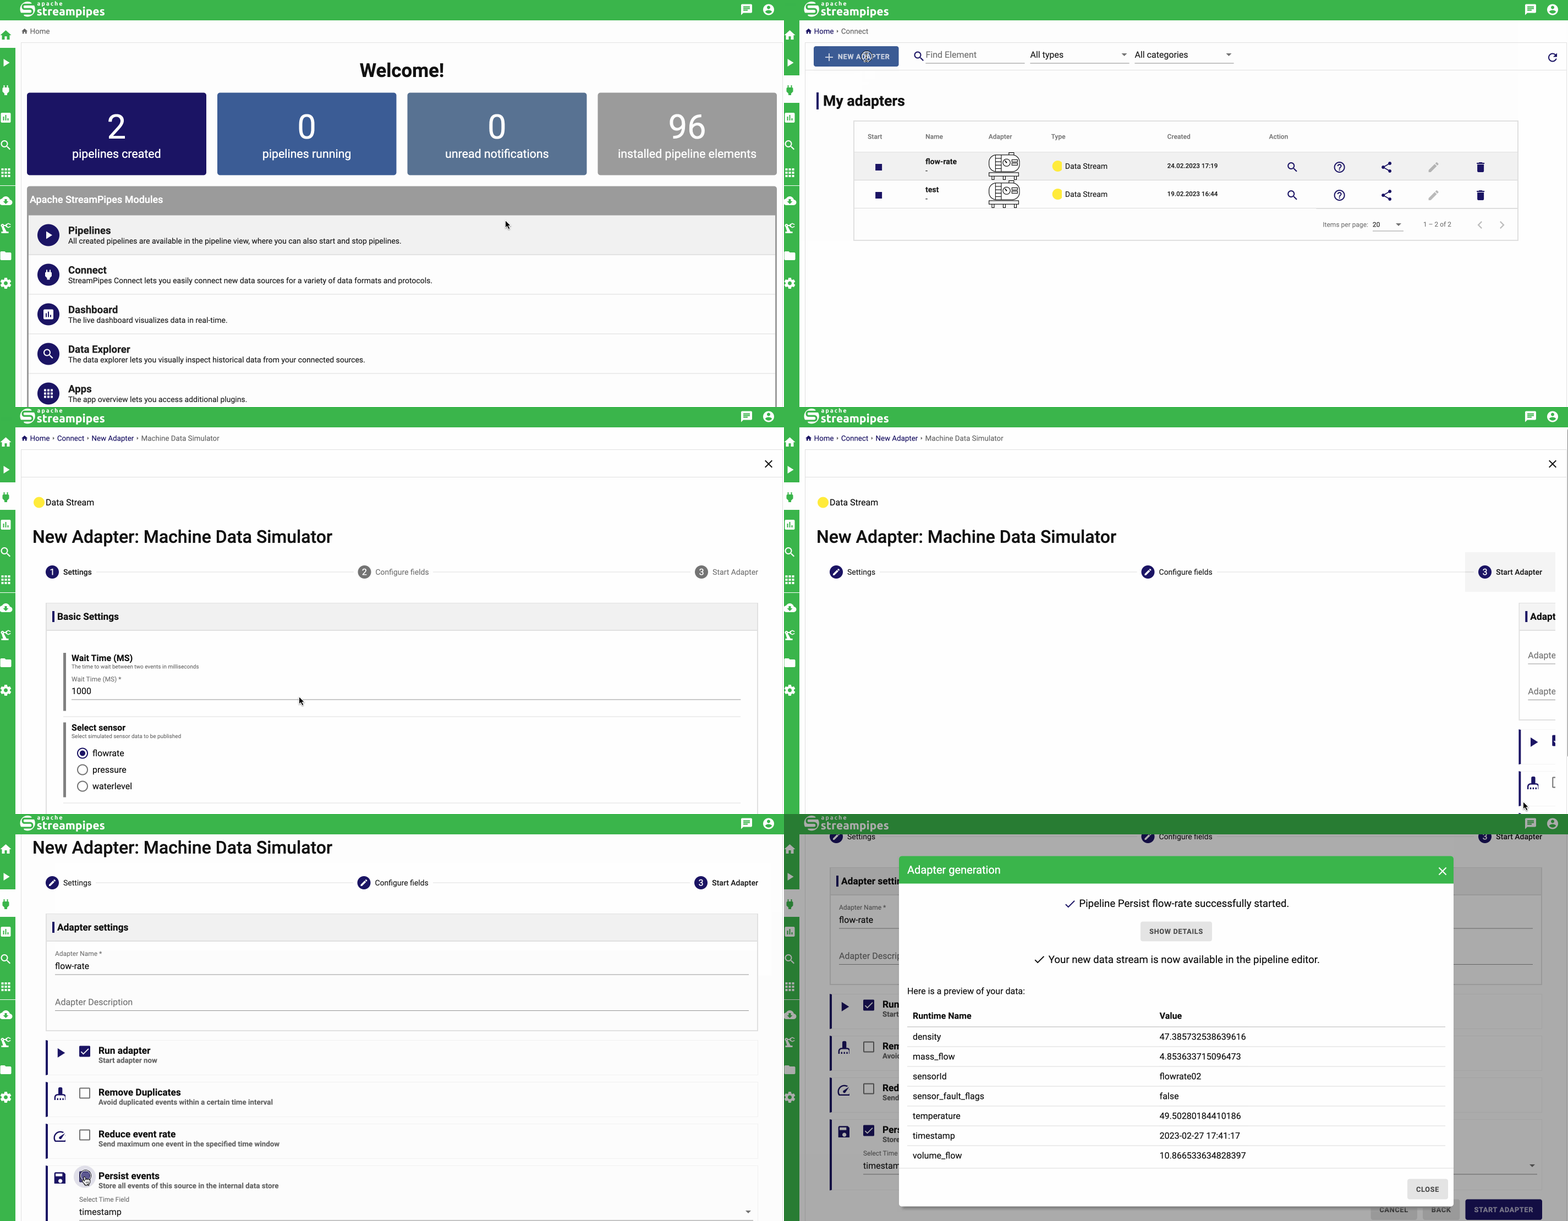
In case you want to reproduce the first two tutorials exactly on your end, you need to create a simple pipeline in StreamPipes like demonstrated below.

How to configure the Python client
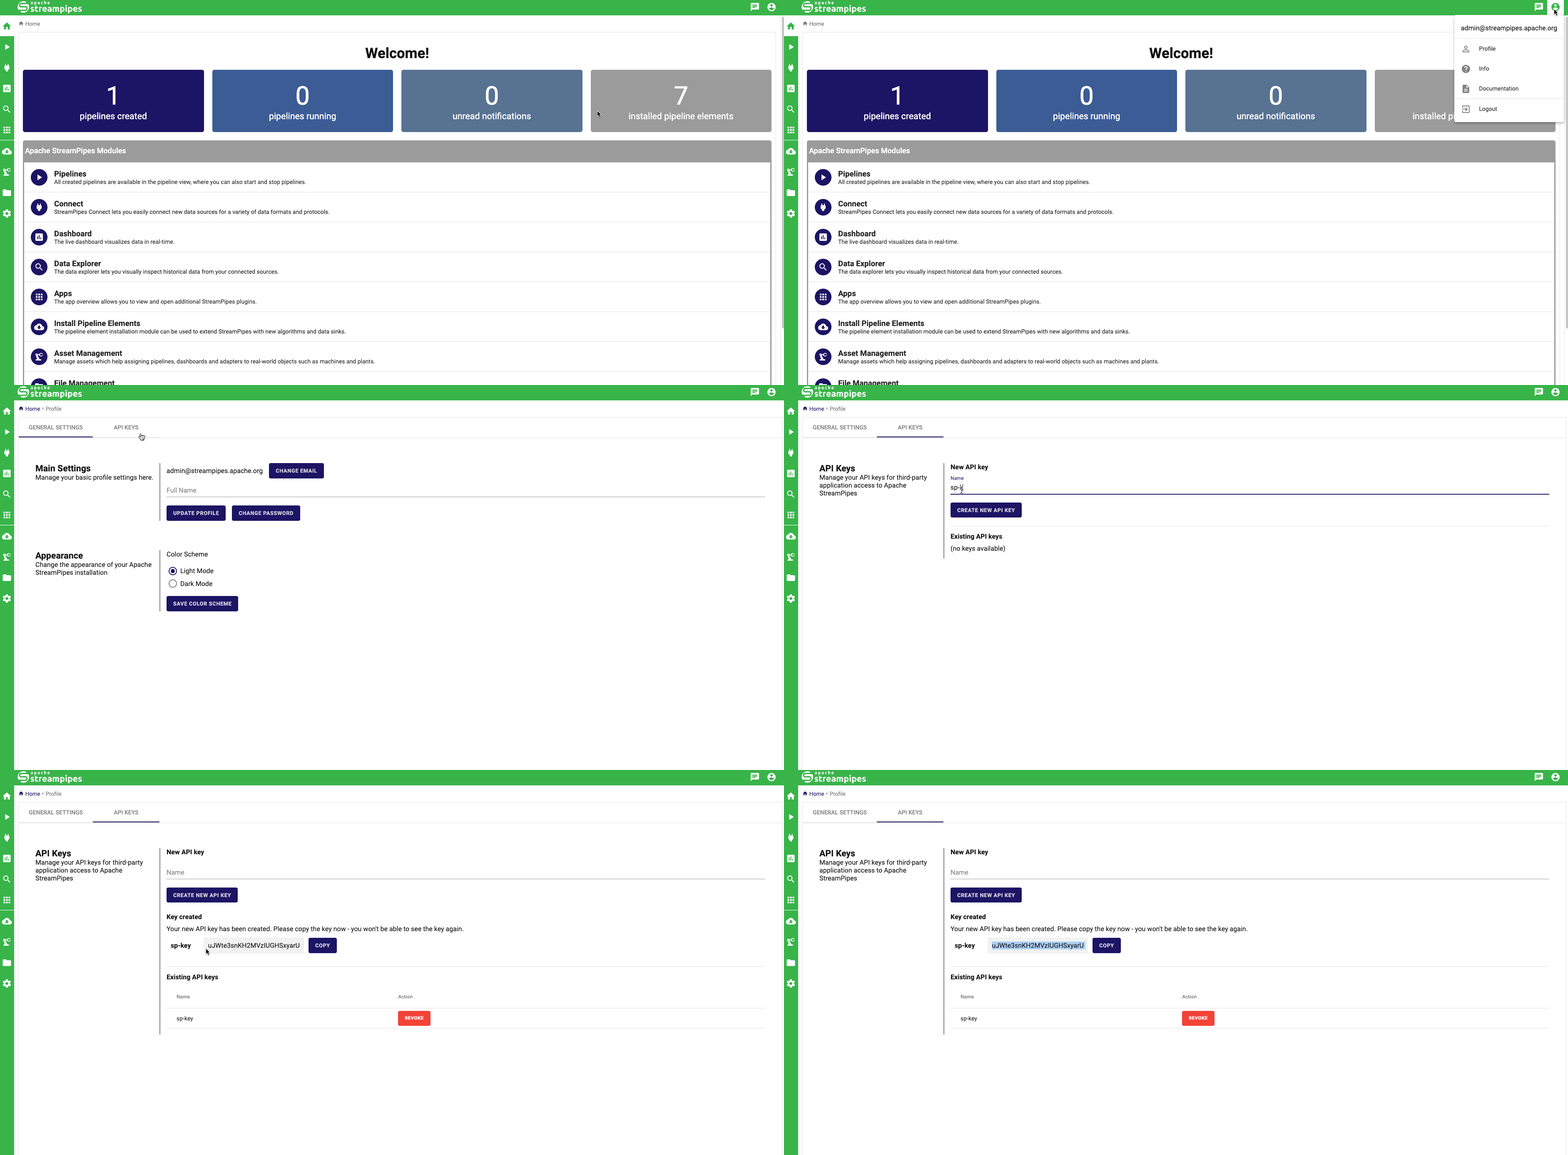
In order to access the resources available in StreamPipes, one must be able to authenticate against the backend. For this purpose, the client so far only supports the authentication via an API token that can be generated via the StreamPipes UI, as you can see below.

Having generated the API token, one can directly start initializing a client instance as follows:
from streampipes.client import StreamPipesClient
from streampipes.client.config import StreamPipesClientConfig
from streampipes.client.credential_provider import StreamPipesApiKeyCredentials
config = StreamPipesClientConfig(
    credential_provider=StreamPipesApiKeyCredentials(
        username="test@streampipes.apache.org",
        api_key="API-KEY",
    ),
    host_address="localhost",
    https_disabled=True,
    port=80
)
Please be aware that connecting to StreamPipes via a https connection is currently not supported by the Python client.
Providing secrets like the api_key as plaintext in the source code is an anti-pattern.
This is why the StreamPipes client also supports passing the required secrets as environment variables.
To do so, you must initialize the credential provider like the following:
StreamPipesApiKeyCredentials()
To ensure that the above code works, you must set the environment variables as expected. This can be done as follows:
import os
os.environ["SP_USERNAME"] = "admin@streampipes.apache.org"
os.environ["SP_API_KEY"] = "XXX"
Having the config ready, we can now initialize the actual client.
client = StreamPipesClient(client_config=config)
That's already it. You can check if everything works out by using the following command:
client.describe()
2023-02-24 17:05:49,398 - streampipes.endpoint.endpoint - [INFO] - [endpoint.py:167] [_make_request] - Successfully retrieved all resources.
2023-02-24 17:05:49,457 - streampipes.endpoint.endpoint - [INFO] - [endpoint.py:167] [_make_request] - Successfully retrieved all resources.

Hi there!
You are connected to a StreamPipes instance running at http://localhost:80.
The following StreamPipes resources are available with this client:
1x DataLakeMeasures
1x DataStreams
This prints you a short textual description of the connected StreamPipes instance to the console.
The created client instance serves as the central point of interaction with StreamPipes.
You can invoke a variety of commands directly on this object.
Are you curious now how you actually can get data out of StreamPipes and make use of it with Python? Then check out the next tutorial on extracting Data from the StreamPipes data lake.
Thanks for reading this introductory tutorial. We hope you like it and would love to receive some feedback from you. Just go to our GitHub discussion page and let us know your impression. We'll read and react to them all, we promise!