StreamPipes Client
This section explains how to use the Apache StreamPipes Java Client. Please read the Python docs to find out how to use the client for Python.
About the StreamPipes client
Sometimes you don't want to write your own extensions to StreamPipes, but want to interact with StreamPipes from external application. One example is to influence the lifecycle of pipelines - think of a feature which automatically starts or stops specific pipelines that monitor the production of a specific product.
Another example is to gather live data from Apache StreamPipes, e.g., to consume data that has been previously connected by an external, standalone application.
For such use cases, we provide the StreamPipes client, which is currently available in Python and Java. This section covers the usage of the Java client.
Using the StreamPipes client
Your client library version should match the installed Apache StreamPipes version. Replace ${streampipes.version} with
the version of your installation, e.g., 0.92.0.
In your Java project, add the following dependency to your pom file:
<dependency>
    <groupId>org.apache.streampipes</groupId>
    <artifactId>streampipes-client</artifactId>
    <version>${streampipes.version}</version>
</dependency>
Obtaining an API token

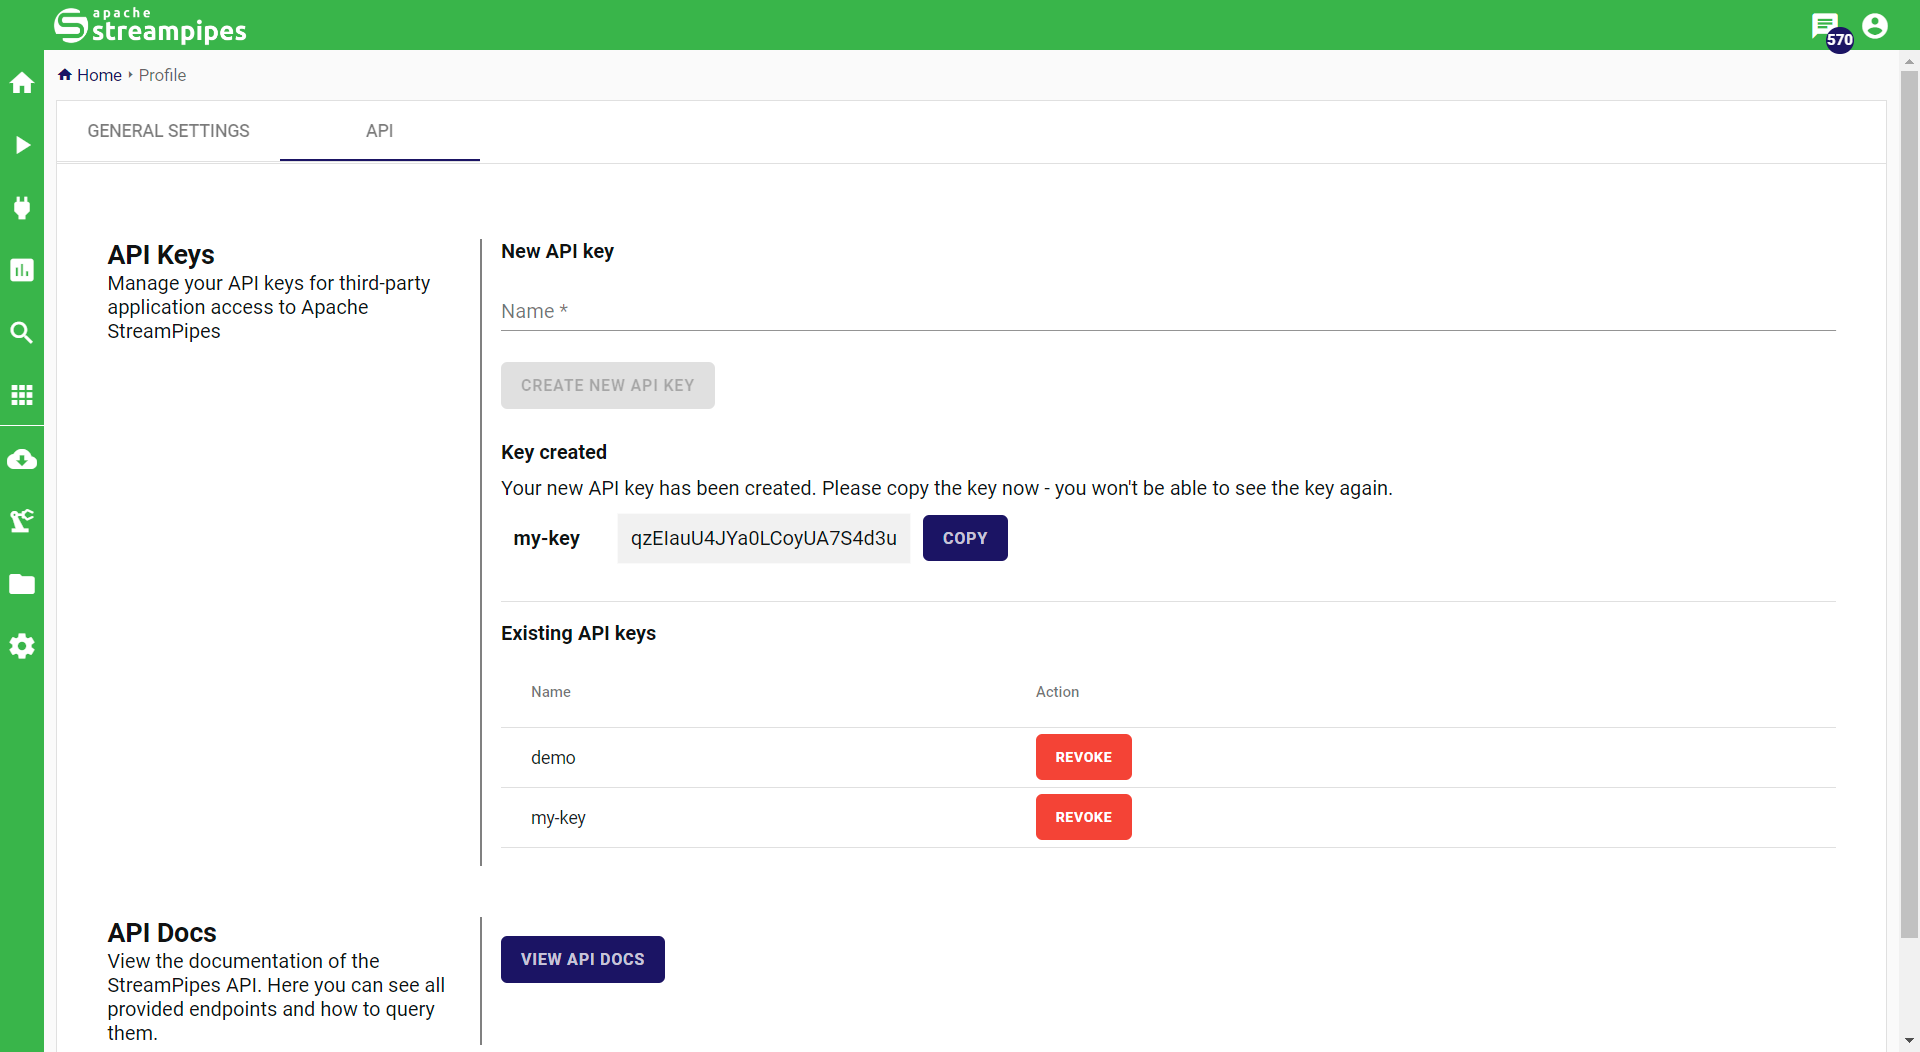
To communicate with Apache StreamPipes, you need to provide proper credentials. There are two ways to obtain credentials:
- An API token, which is bound to a user. The API token can be generate from the UI clicking on the user icon and then
navigate to
Profile/API. - A service user, which can be created by users with role
Admin.
Service users can have their own permissions, while API tokens inherit all permissions from the corresponding user.
Connecting to StreamPipes
Once you have your API token and configured your dependencies, you can connect to an Apache StreamPipes instance as follows:
CredentialsProvider credentials=StreamPipesCredentials
    .withApiKey("admin@streampipes.apache.org","YOUR_API_KEY");

// Create an instance of the StreamPipes client
    StreamPipesClient client=StreamPipesClient
    .create("localhost",8082,credentials,true);
The following configurations are required:
- The
withApiKeymethod expects the username and the API key. Alternatively, use thewithServiceTokenmethod to authenticate as a service user. - The client instance requires the hostname or IP address of your running StreamPipes instance. In addition, you need to provide the port, the credentials object and a flag which needs to be set in case the StreamPipes instance is not served over HTTPS.
- There are short-hand convenience options to create a client instance.
Working with the client
Here are some examples how you can work with the StreamPipes client:
// Get streams
List<SpDataStream> streams=client.streams().all();

// Get a specific stream
    Optional<SpDataStream> stream=client.streams().get("STREAM_ID");

// see the schema of a data stream
    EventSchema schema=stream.get().getEventSchema();

// print the list of fields of this stream
    List<EventProperty> fields=schema.getEventProperties();

// Get all pipelines
    List<Pipeline> pipelines=client.pipelines().all();

// Start a pipeline
    PipelineOperationStatus status=client.pipelines().start(pipelines.get(0));

// Stop a pipeline with providing a pipeline Id
    PipelineOperationStatus status=client.pipelines().stop("PIPELINE_ID");

// Get all pipeline element templates
    List<PipelineElementTemplate> templates=client.pipelineElementTemplates().all();

// Get all data sinks
    List<DataSinkInvocation> dataSinks=client.sinks().all();
Consuming live data
StreamPipes supports a variety of messaging protocols to internally handle data streams. If you plan to gather live data
from the client library, you also need to add one or more of the supported messaging
protocols to the pom file. The default protocol depends on the StreamPipes configuration and is set in the .env file
in your installation folder.
<!-- For Kafka support -->
<dependency>
    <groupId>org.apache.streampipes</groupId>
    <artifactId>streampipes-messaging-kafka</artifactId>
    <version>${streampipes.version}</version>
</dependency>

        <!-- For Nats support -->
<dependency>
<groupId>org.apache.streampipes</groupId>
<artifactId>streampipes-messaging-nats</artifactId>
<version>${streampipes.version}</version>
</dependency>


        <!-- For MQTT support -->
<dependency>
<groupId>org.apache.streampipes</groupId>
<artifactId>streampipes-messaging-mqtt</artifactId>
<version>${streampipes.version}</version>
</dependency>
In addition, add the message format that is used internally by StreamPipes. The default message format used by StreamPipes is JSON, so let's include the dependency as well:
<!-- For JSON support -->
<dependency>
    <groupId>org.apache.streampipes</groupId>
    <artifactId>streampipes-dataformat-json</artifactId>
    <version>${streampipes.version}</version>
</dependency>
Once you've imported the dependencies, it is easy to consume live data. First, register the protocols and formats in your client instance:
client.registerProtocol(new SpKafkaProtocolFactory());

// or Nats:
    client.registerProtocol(new SpNatsProtocolFactory());

// data format:
    client.registerDataFormat(new JsonDataFormatFactory());
Then, you are ready to consume data:
client.streams().subscribe(dataStreams.get(0),new EventProcessor() {
@Override
public void onEvent(Event event) {
    // example
    MapUtils.debugPrint(System.out,"event",event.getRaw());
    }
    });
There are many more options to work with the StreamPipes Client - e.g., you can trigger emails directly from the API. Just explore the various classes and interfaces provided by the client!